Blazor WebAssembly (Hosted) with Okta Authentication in 10 minutes

Challenges

  • Securing authentication in Blazor WebAssembly apps.
  • Managing user identity and access control effectively.
  • Ensuring seamless integration with third-party providers.

Solutions

  • Implement Okta for secure authentication.
  • Use OAuth and OpenID Connect for identity management.
  • Configure Blazor WebAssembly to integrate with Okta.

Benefits

  • Enhanced security with modern authentication.
  • Simplified identity management and access control.
  • Seamless user experience with Single Sign-On (SSO).

What are we building?

The goal of this post is to create a simple ASP.NET Core Hosted Blazor WebAssembly website with an authentication mechanism using Okta as the identity provider. Since WebAssembly is a single-page application (SPA), we will be using the proof key for code exchange (PKCE, pronounced “pixy”) authentication flow which helps mitigate problems with authorization code interception in public clients (e.g., web browsers).

Requirements

You have a beginners level knowledge of Blazor WebAssembly
You are using Visual Studio 2022
You have free Okta developer account (https://developer.okta.com/signup/)

Step 1: Create the project in Visual Studio

  • Open Visual Studio 2022 and select new Blazor WebAssembly App project.
  • Name your project anything you want.
  • On the Additional Information dialog, select the following:
    • Authentication Type: Individual Accounts
      NOTE: we are not going to setup a user database, but we will use the default routing to provide the authentication callback controllers
    • Configure for HTTPS
    • APS.NET Core Hosted option

Step 2: Modify BlazorWasmHosted4Blog.Server

  • Add Okta.AspNetCore NuGet package
    From the Package Manager prompt, type: Install-Package Okta.AspNetCore -ProjectName BlazorWasmHosted4Blog.Server
    or, use the Nuget Package Manager:

  • Open Properties/launchsettings.json
    Make note of the URL value your application is using for HTTPS. In this example, if we are debugging from IISExpress, the application URL will be https:// localhost:44365. If we are debugging from Kestrel, then the Application URL will be https:// localhost:7198. This URL value will be used shortly in the Okta app integration configuration.
  • Edit Program.cs in the *.Server project
    Comment out the DBContext, IdentityServer and JWT Authentication services (don’t delete these lines, we might use these in an upcoming post). This code was added by default because we chose the Individual Accounts authentication type, but we will not be using it for now.
  • Next, add the Okta/OIDC service to the DI container. This code will direct the authentication manager to use Okta as the default identity provider.
    builder.Services.AddAuthentication(options =>
    {
    options.DefaultAuthenticateScheme = OktaDefaults.ApiAuthenticationScheme;
    options.DefaultChallengeScheme = OktaDefaults.ApiAuthenticationScheme;
    options.DefaultSignInScheme = OktaDefaults.ApiAuthenticationScheme;
    })
    .AddOktaWebApi(new OktaWebApiOptions()
    {
    OktaDomain = builder.Configuration["Okta:OktaDomain"]
    });
  • Also, comment out the line “app.UseIdentityServer();” as we are using Okta instead.

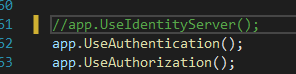
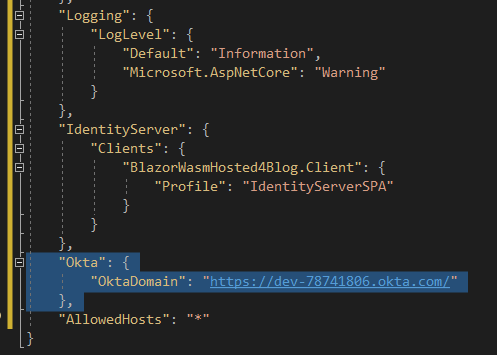
Notice the Configuration key “Okta:OktaDomain” in the code above. Currently that does not exist, so we will add that to the *.Server appsetting.json file. But first, let’s configure the Okta app integration.

Step 3: Logon to your Okta developer account

  • Create App Integration
    Select “Applications->Applications” in the sidebar menu, and select “Create App Integration.”

    Choose Sign-in method: OIDC – OpenID Connect.Choose Application type: Single-Page Application, and click Next.Choose a name for this app integration and ensure Grant type: Authorization Code is checked.Using the Port we copied from the project’s launchSettings.json, replace the Sign-in and Sign-out redirect URLs with:
    https://localhost:{PORT}/authentication/login-callback
    and
    https://localhost:{PORT}/authentication/logout-callback
    This utilizes the callbacks setup by ASP.NET Core Identity.
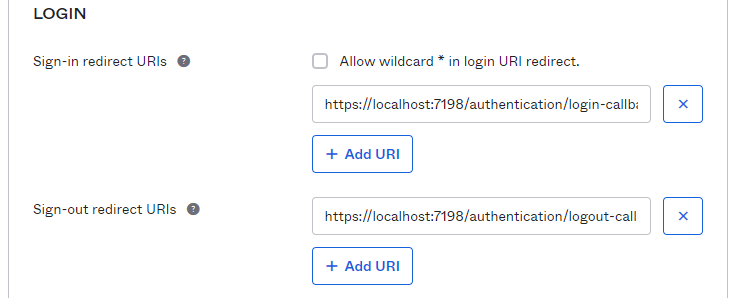
    For now we will leave everything else as their defaults and allow everyone in the organization access to this application.
  • Copy the Client Credentials and Okta DomainWe will use these in the project appsetting.json. Notice that a Client Secret is not included in the app integration configuration. PKCE is the default for SPA applications on Okta. If you decide to use another OIDC identity provider, make sure this is selected.

Step 4: Return to the BlazorWasmHosted2.Server project

  • Edit appsettings.json
    Now we are going to use the configuration from above to set the Okta:OktaDomain value in the Server project.
    "Okta": {
    "OktaDomain": "{OKTAURL}"
    },

  • Edit _LoginPartial.cshtml
    _LoginPartial.cshtml is located in the .Server project under Areas->Identity->Pages->Shared. Locate the line:
    @if (SignInManager.IsSignedIn(User))
    and change it to:
    @if (User is not null)


    For now we are going to assume if the user object has been initialized, then we are dealing with an authorized user. This is not production-ready. You will want to verify claims from the identity provider, but that is outside the scope of this post.

Step 5: Open the BlazorWasmHosted2.Client project

  • Add and edit appsettings.json
    By default the Client project will not have an appsettings file, so add new JSON file in the wwwroot folder and name it “appsettings.json”. Replace the default content with the Okta app configuration values.
    {
    "Okta": {
    "Authority": "https://{OKTAURL}/oauth2/default",
    "ClientId": "CLIENTID"
    }
    }

  • Edit Program.cs in the *.Client project
    Add the following code before “builder.Services.AddApiAuthorization();” to provider values to the authenticating service.

    builder.Services.AddOidcAuthentication(options =>
    {
    options.ProviderOptions.Authority = builder.Configuration.GetValue("Okta:Authority");
    options.ProviderOptions.ClientId = builder.Configuration.GetValue("Okta:ClientId");
    options.ProviderOptions.ResponseType = "code";
    });

Step 6: Run BlazorWasmHosted2.Server

Click “Log in”

The application redirects to the Okta app Sign-in page. Submit your developer account login information.

Now the application is redirected back to your Blazor app, and you are authenticated!